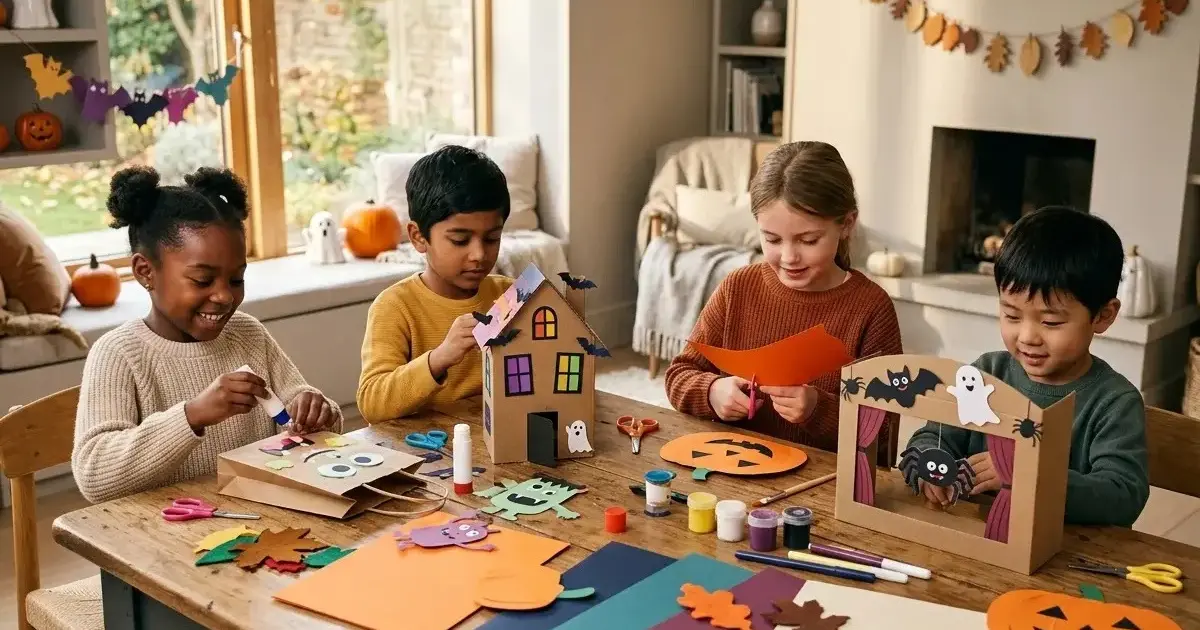
25 Easy Halloween Crafts for Kids That Are Actually Fun to Make
Halloween crafts for kids are more fun when children can make something, play with it, and proudly show it off afterward. Instead of another afternoon of coloring the same pumpkin picture, these Halloween crafts turn cardboard boxes, paper plates, leaves, cups, and other everyday materials into decorations, toys, characters, and imaginative activities.
From a cardboard shadow puppet theater to glowing galaxy bats, miniature haunted houses, friendly monsters, and a Halloween world inside a shoebox, these projects are designed to be creative without requiring a closet full of expensive craft supplies.
Most can be adapted for different ages and skill levels, and many are perfect for a weekend afternoon, a Halloween party, or a screen-free October activity.
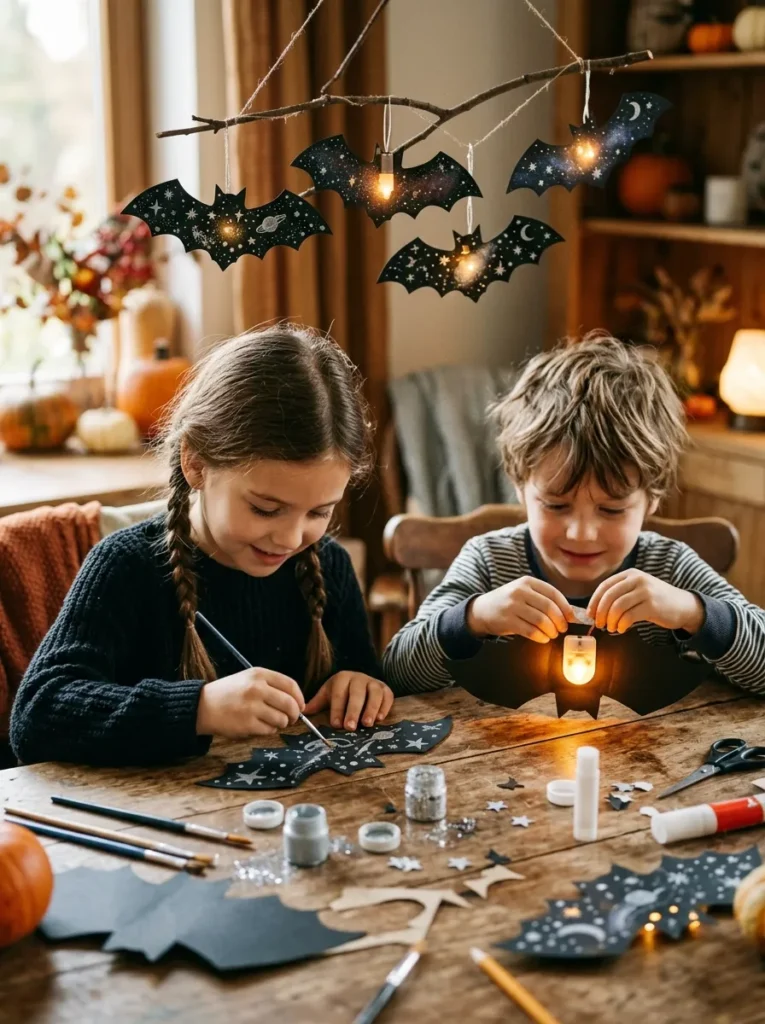
1. DIY Glowing Galaxy Bats
Turn ordinary black bats into a Halloween decoration that looks surprisingly magical when the lights go down.
What you’ll need
- Black cardstock or thin cardboard
- Pencil
- Scissors
- Glue
- Silver, white, or glow-in-the-dark craft paint
- Small battery-powered LED tea lights
- String or ribbon
- Optional: small paper stars
How to make it
Step 1: Draw several bat shapes on black cardstock. Make a mixture of large and small bats so the finished display has more depth.
Step 2: Cut out the bats and decorate them with tiny stars, dots, moons, or galaxy-inspired patterns.
Step 3: Let the paint dry completely.
Step 4: Carefully attach a small battery-powered LED light behind each bat or position the lights behind the bats when displaying them.
Step 5: Hang the bats at different heights against a wall, near a window, or above a Halloween activity table.
Make it more fun
Let each child design a different “night sky” for their bat. One could have stars, another could have a moon, and another could have a colorful galaxy.
Safety tip: Use battery-powered LED lights rather than candles or open flames.
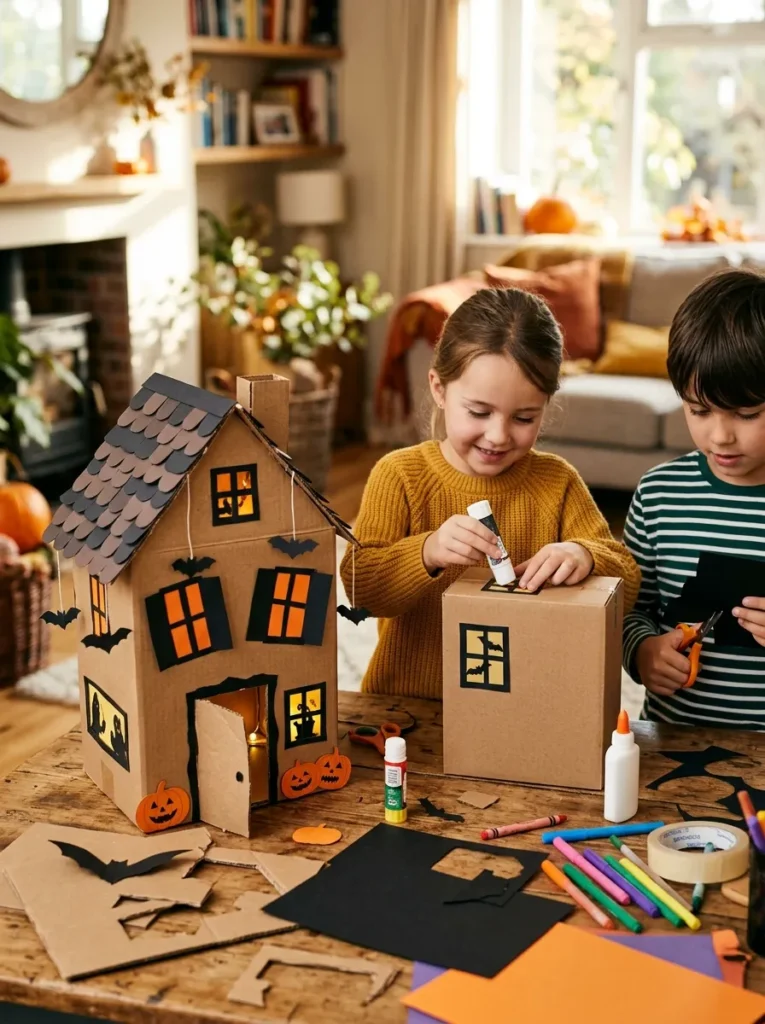
2. Turn a Cardboard Box Into a Haunted House
A cardboard box can become a miniature haunted house that doubles as a Halloween decoration and imaginative-play setup.
What you’ll need
- Small or medium cardboard box
- Black, gray, orange, and white paper
- Cardboard scraps
- Glue
- Scissors
- Markers or washable paint
- Optional: cotton balls for cobwebs
How to make it
Step 1: Place the box so one of its open sides faces forward. This will become the front of your haunted house.
Step 2: Cut out windows and a doorway. An adult can help with any cutting that requires a craft knife.
Step 3: Cover or paint the outside of the box in dark colors.
Step 4: Add crooked windows, a spooky door, bats, pumpkins, ghosts, or a tiny chimney.
Step 5: Make miniature characters from paper or cardboard and place them inside.
Step 6: Add a small battery-powered LED light inside the house for a warm glow.
Make it your own
Instead of making a scary house, create a friendly monster house, a witch’s cottage, or a tiny Halloween village.
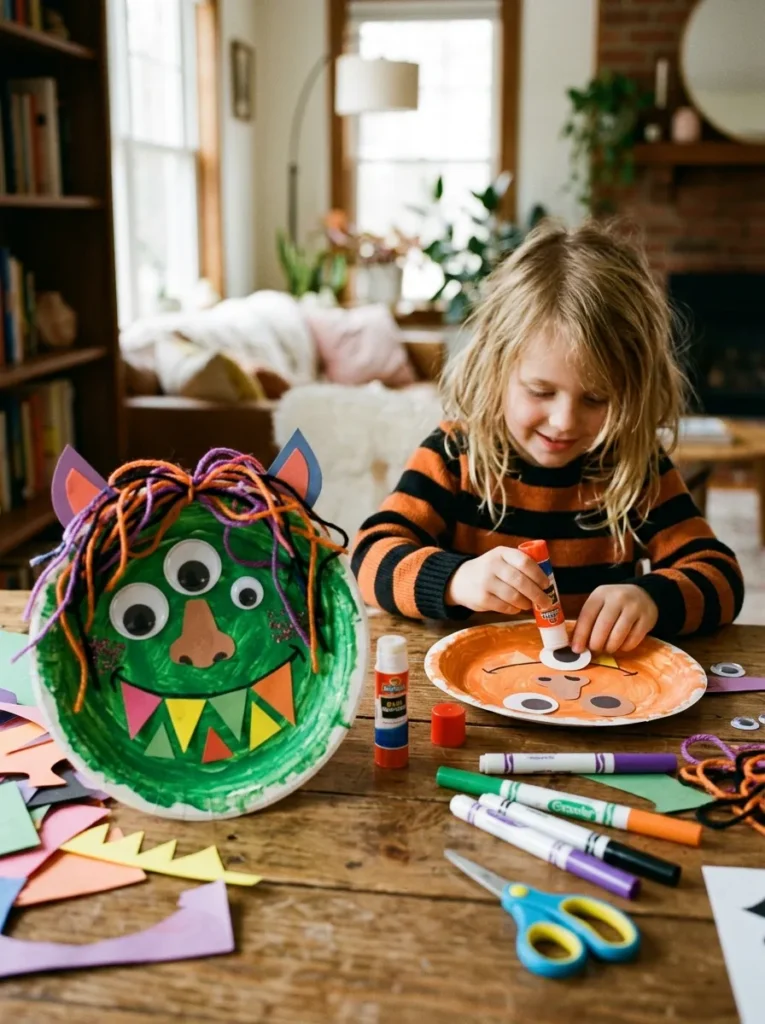
3. Paper Plate Halloween Monster
Paper plates are an easy starting point for colorful monsters that children can design completely on their own.
What you’ll need
- Paper plates
- Colored paper
- Glue
- Scissors
- Markers
- Googly eyes, if available
- Yarn or paper strips
How to make it
Step 1: Turn a paper plate into the monster’s face.
Step 2: Add eyes. Try one giant eye, three small eyes, or a whole row of eyes.
Step 3: Cut paper teeth, horns, ears, or hair.
Step 4: Glue the pieces onto the plate.
Step 5: Give the monster a name and personality.
The fun part
Ask children:
What is your monster’s name? What does it eat? Is it friendly? What is it afraid of?
Now a simple craft becomes a storytelling game.
4. Halloween Leaf Characters
Fall leaves can become surprisingly expressive Halloween characters.
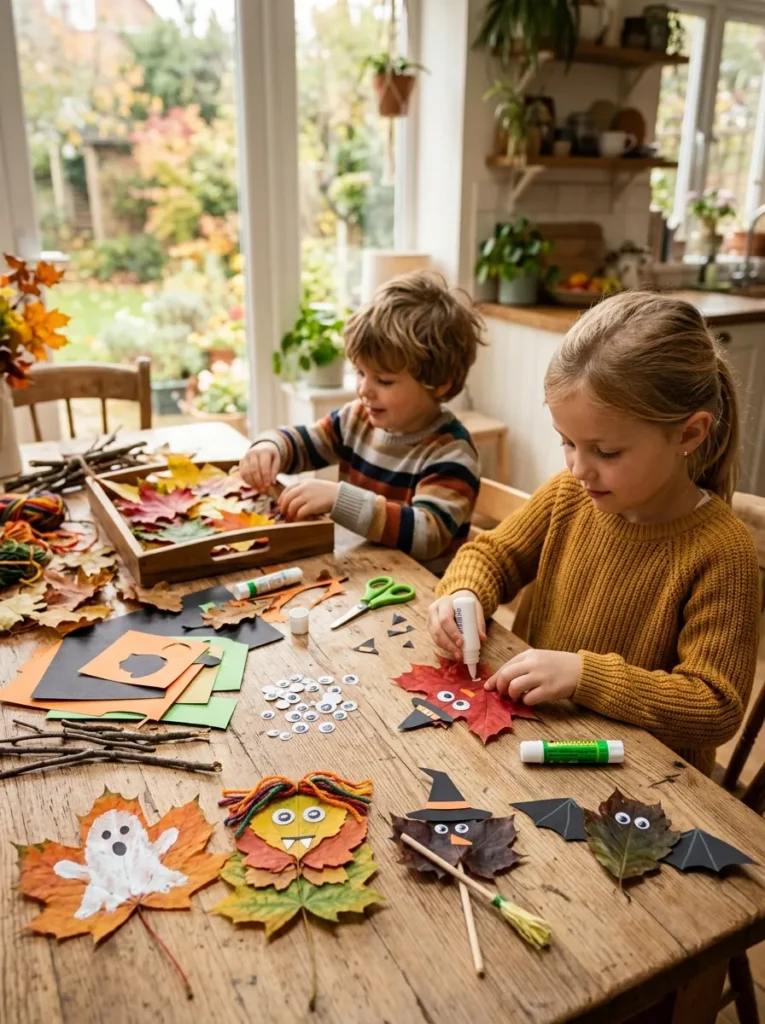
What you’ll need
- Clean, dry autumn leaves
- Paper or cardstock
- Glue
- Markers
- Small pieces of colored paper
- Optional: paint
How to make it
Step 1: Collect a variety of dry leaves.
Step 2: Look at each leaf and decide what its shape resembles.
A long leaf might become a witch’s hat. A wide leaf might become a monster’s body.
Step 3: Add eyes, mouths, hats, arms, wings, or other details with paper.
Step 4: Glue the finished characters onto cardstock.
Step 5: Add a background such as a moonlit sky, haunted forest, or pumpkin patch.
This is a particularly nice way to combine fall nature crafts with Halloween creativity.
5. Toilet Paper Roll Bats
Save a few cardboard tubes and turn them into a group of hanging Halloween bats.
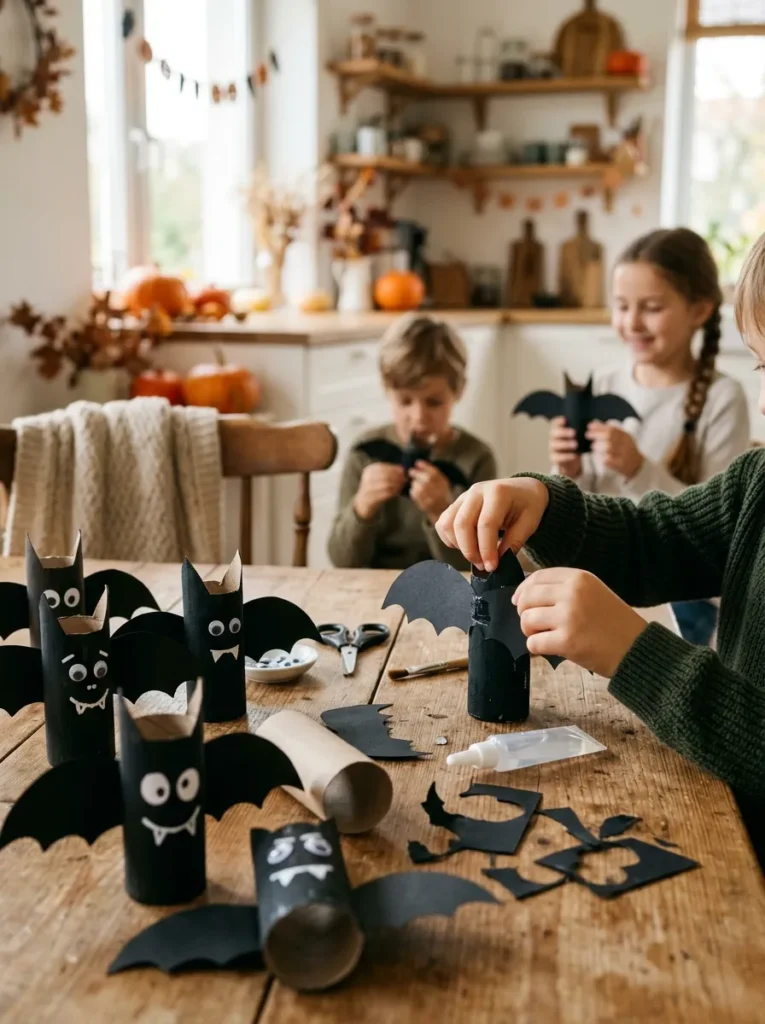
What you’ll need
- Empty cardboard tubes
- Black paper or black washable paint
- White paper
- Glue
- Scissors
- String
How to make it
Step 1: Cover the cardboard tube with black paper or paint it black.
Step 2: Fold the top edges inward to create pointed ears.
Step 3: Draw and cut a pair of bat wings.
Step 4: Glue the wings onto the sides.
Step 5: Add eyes and a small mouth.
Step 6: Attach string if you want to hang the bats.
Make several bats with different expressions and hang them together.
6. Halloween Monster Pencil Toppers
Turn ordinary pencils into tiny Halloween characters.
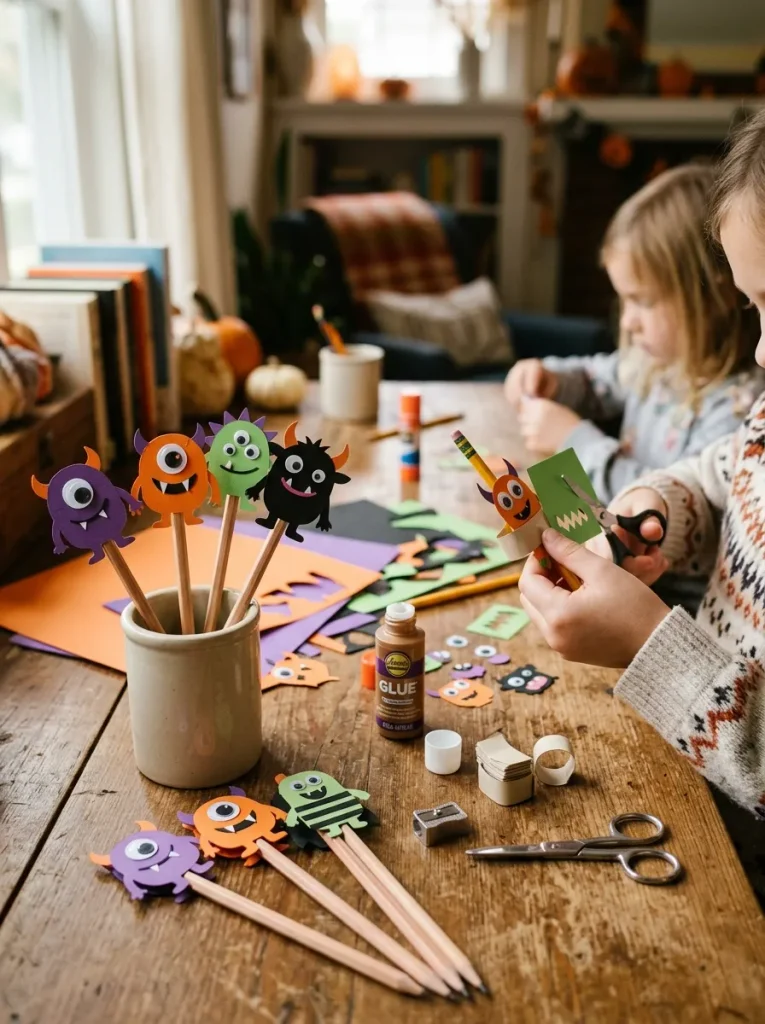
What you’ll need
- Cardstock
- Pencil
- Scissors
- Glue or tape
- Markers
How to make it
Step 1: Draw a small monster, ghost, pumpkin, bat, or other Halloween character.
Step 2: Cut it out.
Step 3: Create a small paper loop that fits around the top of a pencil.
Step 4: Attach the character to the loop.
Step 5: Slide it onto the pencil.
Children can make a whole collection and give each character a different personality.
7. Paper Cup Flying Ghosts
Create lightweight ghosts that look as if they’re floating through the room.
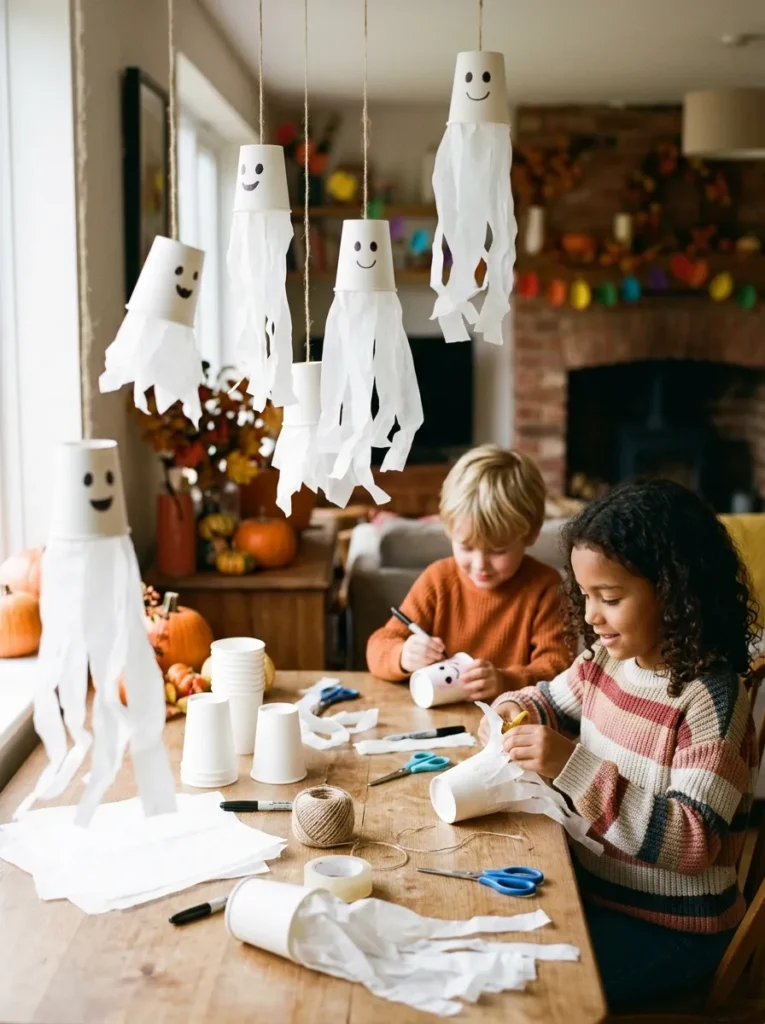
What you’ll need
- White paper cups
- White tissue paper or lightweight white paper
- Black marker
- String
- Glue or tape
How to make it
Step 1: Turn a paper cup upside down.
Step 2: Cut strips of tissue paper and attach them around the cup.
Step 3: Draw a friendly ghost face.
Step 4: Attach a piece of string to the top.
Step 5: Hang the ghosts at different heights.
Use several ghosts together to create a floating Halloween display.
8. Cardboard Tube Halloween Characters
One cardboard tube can become an entire Halloween cast.
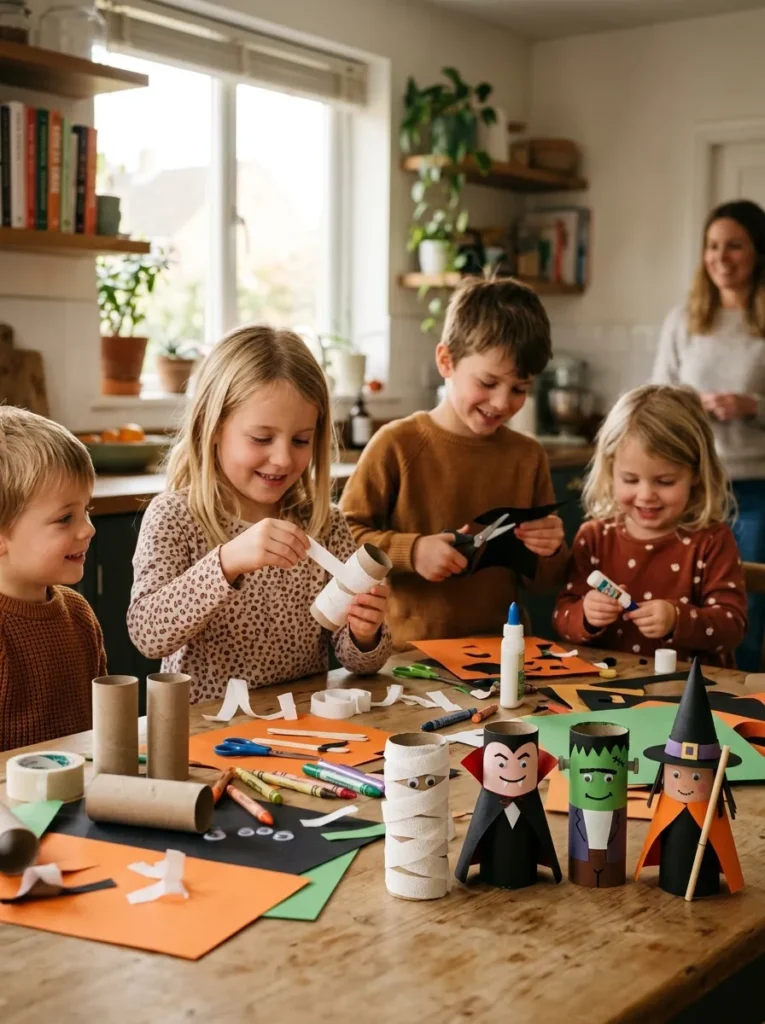
Try making a:
- mummy
- vampire
- Frankenstein-style monster
- witch
- ghost
How to make them
Cover each tube with paper or paint. Add the character’s face and distinctive features using small pieces of cardstock.
For a mummy, wrap thin strips of white paper around the tube. For a vampire, add a cape. For a witch, add a pointed paper hat.
Display the characters together as a miniature Halloween collection.
9. DIY Halloween Shadow Puppet Theater
This is one of the hero projects in this article because it isn’t just a craft. Kids can build it and then use it to put on their own Halloween show.
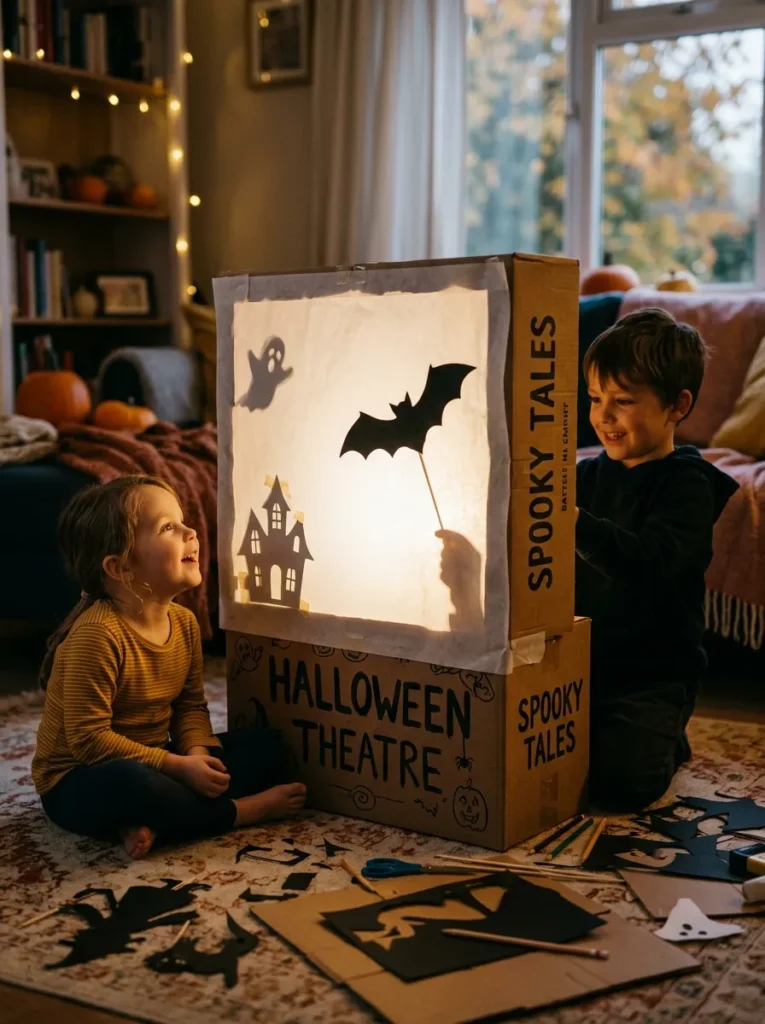
What you’ll need
For the theater:
- Medium cardboard box
- White parchment paper, tracing paper, or thin white paper
- Tape
- Scissors
- Cardstock
- Markers or paint
For the puppets:
- Black cardstock or thin cardboard
- Wooden craft sticks or paper straws
- Tape
- Pencil
- Scissors
For the light:
- Flashlight or battery-powered LED light
How to make the theater
Step 1: Prepare the box
Place the cardboard box on its side. Draw a large rectangle on the front panel, leaving a sturdy cardboard border around it.
An adult can carefully cut out the center section to create the stage opening.
Step 2: Add the screen
Cut a piece of parchment paper or tracing paper slightly larger than the opening.
Tape it firmly behind the cardboard frame. Keep the paper reasonably flat so the shadows are easy to see.
Step 3: Decorate the theater
Let the kids decorate the cardboard frame with pumpkins, stars, bats, moons, curtains, spiderwebs, or other Halloween details.
Keep the stage opening clear.
Make the shadow puppets
Step 4: Draw simple Halloween silhouettes on black cardstock.
Good starter characters include:
- ghost
- bat
- pumpkin
- witch
- black cat
- spider
- friendly monster
- haunted house
Step 5: Cut out each silhouette.
Step 6: Tape each character to a craft stick or paper straw.
Simple silhouettes work better than highly detailed designs because the outline needs to be recognizable when projected onto the screen.
Put on the show
Step 7: Place the flashlight or LED light behind the screen.
Step 8: Have one child hold a puppet between the light and screen while another child watches from the front.
Step 9: Experiment with distance.
Move the puppet closer to the screen for a smaller, sharper shadow. Move it farther away to make the shadow larger.
Turn the craft into a Halloween adventure
Now create a simple story.
For example:
The Missing Pumpkin
A friendly ghost discovers that a special Halloween pumpkin has disappeared. Along the way, the ghost meets a bat, black cat, witch, and monster. Each character gives a clue.
Children can create the ending themselves.
For an extra challenge, ask them to create:
- a new Halloween character
- a special sound for each character
- a beginning, middle, and ending
- one surprise twist
Safety tip: Use a battery-powered light rather than a candle or open flame.
10. Halloween Paper Lanterns
Create colorful Halloween lanterns using paper and safe LED lights.
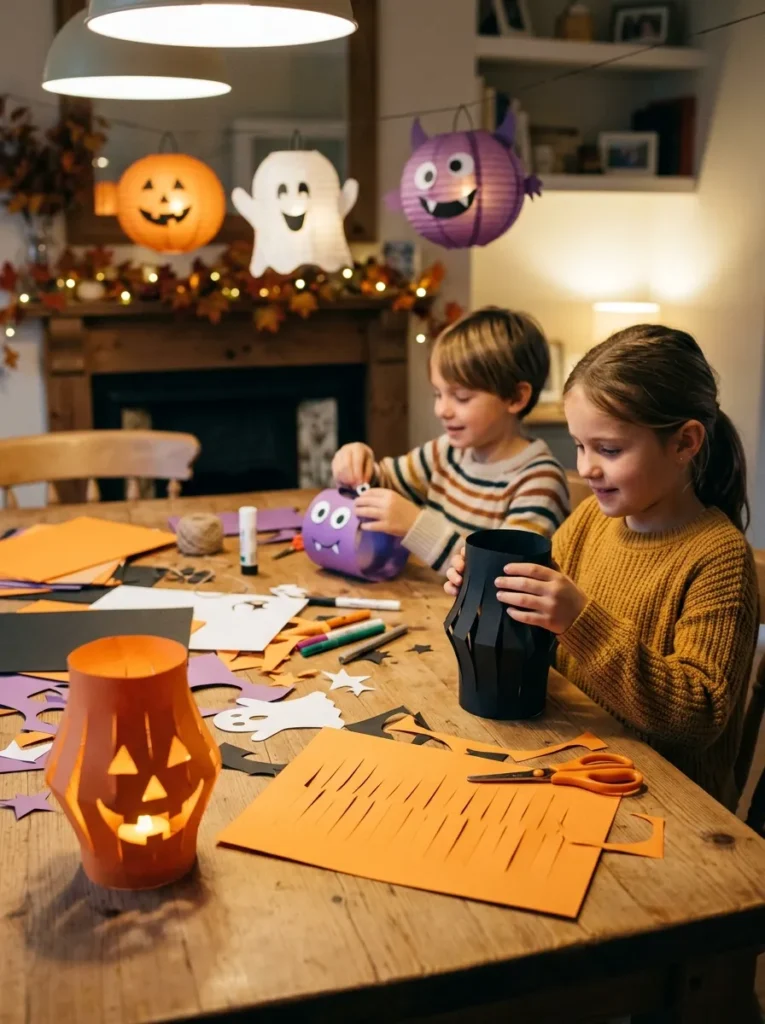
What you’ll need
- Orange, black, purple, or white cardstock
- Scissors
- Glue or tape
- Pencil
- Battery-powered LED tea light
How to make it
Step 1: Fold a sheet of cardstock in half.
Step 2: Cut several parallel slits from the folded edge toward the opposite edge, leaving a border uncut.
Step 3: Open the paper and form it into a cylinder.
Step 4: Secure the edges with glue or tape.
Step 5: Add Halloween details such as eyes, bats, stars, or pumpkin faces.
Step 6: Place an LED light underneath or inside the lantern.
Never use a real candle inside a paper lantern.
11. Popsicle Stick Haunted House
Craft sticks make a simple structure that children can decorate into their own miniature haunted house.
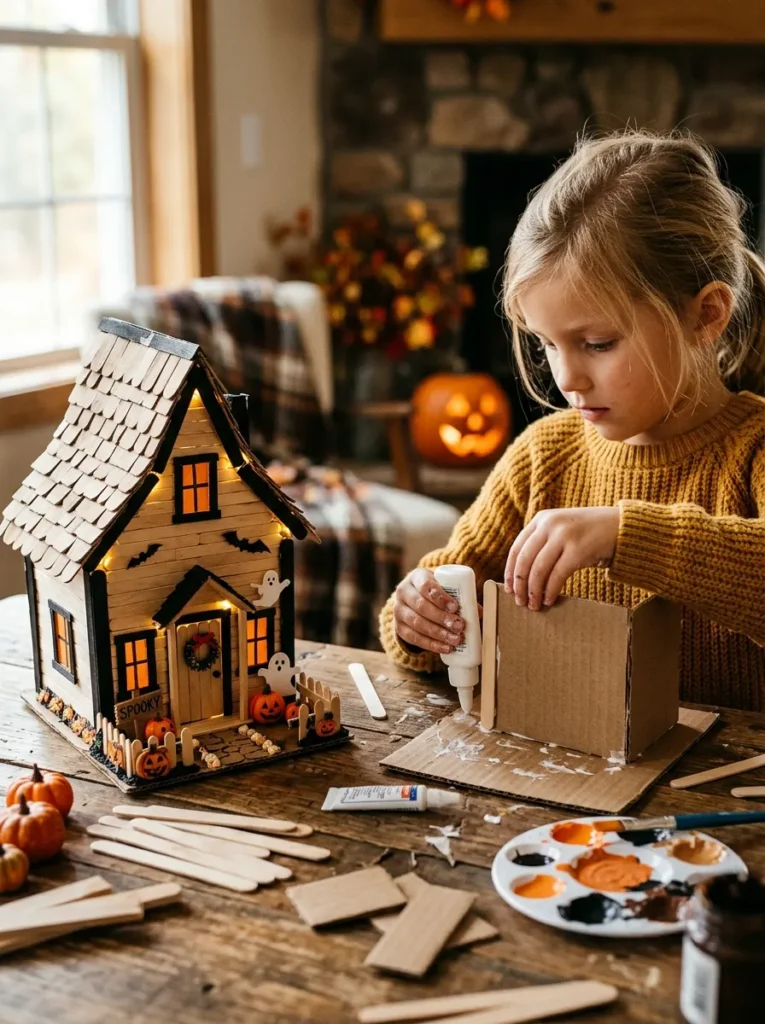
What you’ll need
- Craft sticks
- Cardboard
- Glue
- Paint or markers
- Colored paper
- Scissors
How to make it
Create a cardboard base first. Arrange craft sticks to form walls, a roof, windows, and a door.
Once the structure is secure, decorate it with crooked windows, a moon, bats, pumpkins, or a tiny ghost.
Older children can experiment with creating multiple rooms or adding a small yard.
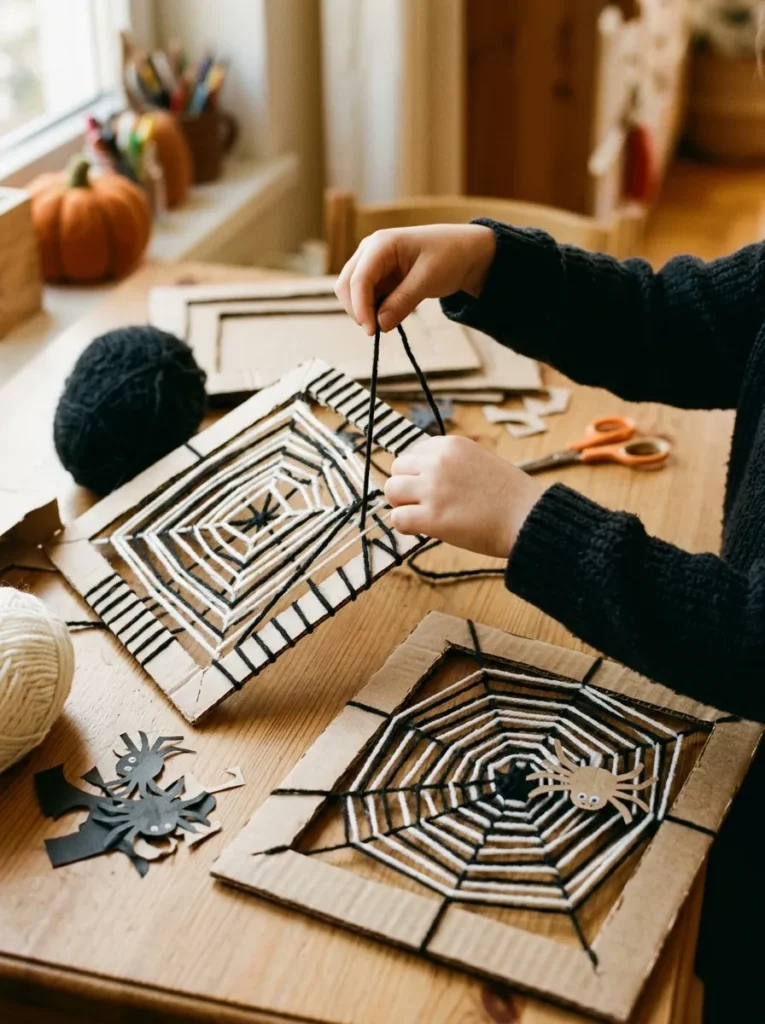
12. Halloween Spiderweb Yarn Art
Turn yarn and cardboard into a spooky web that can become wall art.
What you’ll need
- Cardboard
- Black, white, or purple yarn
- Scissors
- Tape
- Optional: paper spider
How to make it
Step 1: Cut a simple cardboard frame.
Step 2: Wrap yarn around the frame in several directions.
Step 3: Weave additional yarn across the crossing points to create a web pattern.
Step 4: Make a small paper spider and attach it to the web.
Use different yarn colors for a more playful look.
13. Egg Carton Spooky Creatures
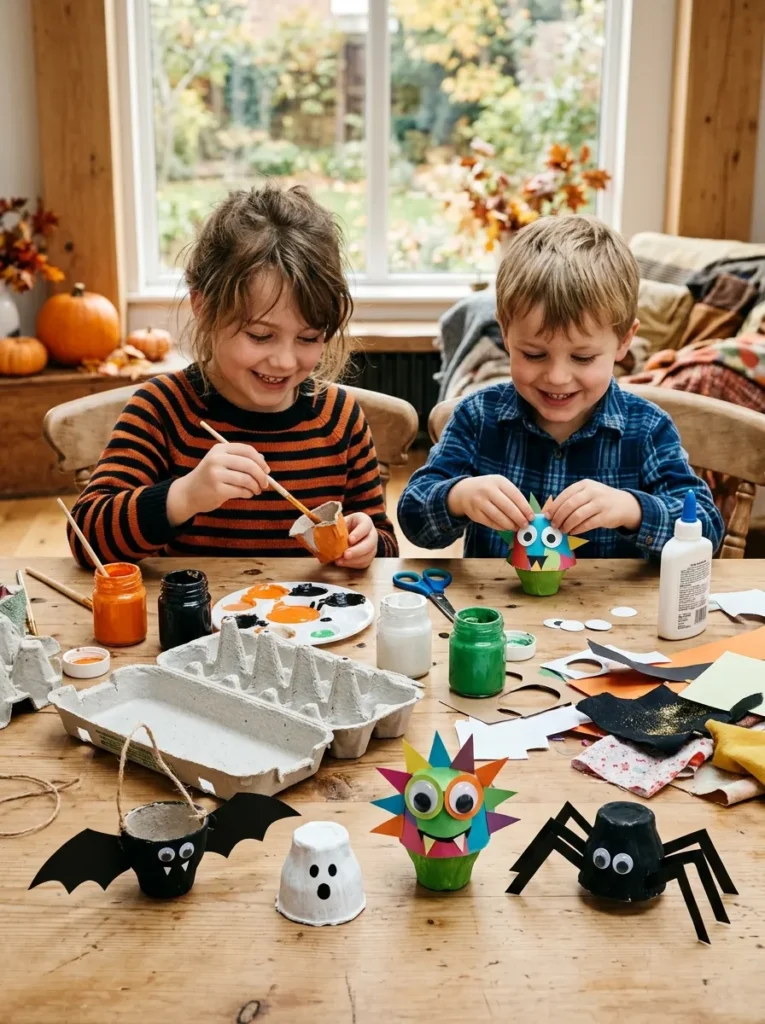
Instead of throwing away an empty egg carton, turn the individual cups into miniature Halloween creatures.
What you’ll need
- Clean cardboard egg carton
- Paint
- Scissors
- Paper
- Glue
- Markers
How to make it
Cut individual cups from the carton.
Turn them into:
Bats: add wings and ears.
Ghosts: paint them white and add faces.
Monsters: use bright colors, funny eyes, and paper teeth.
Spiders: add paper or pipe-cleaner legs.
Display several creatures together for a miniature Halloween collection.
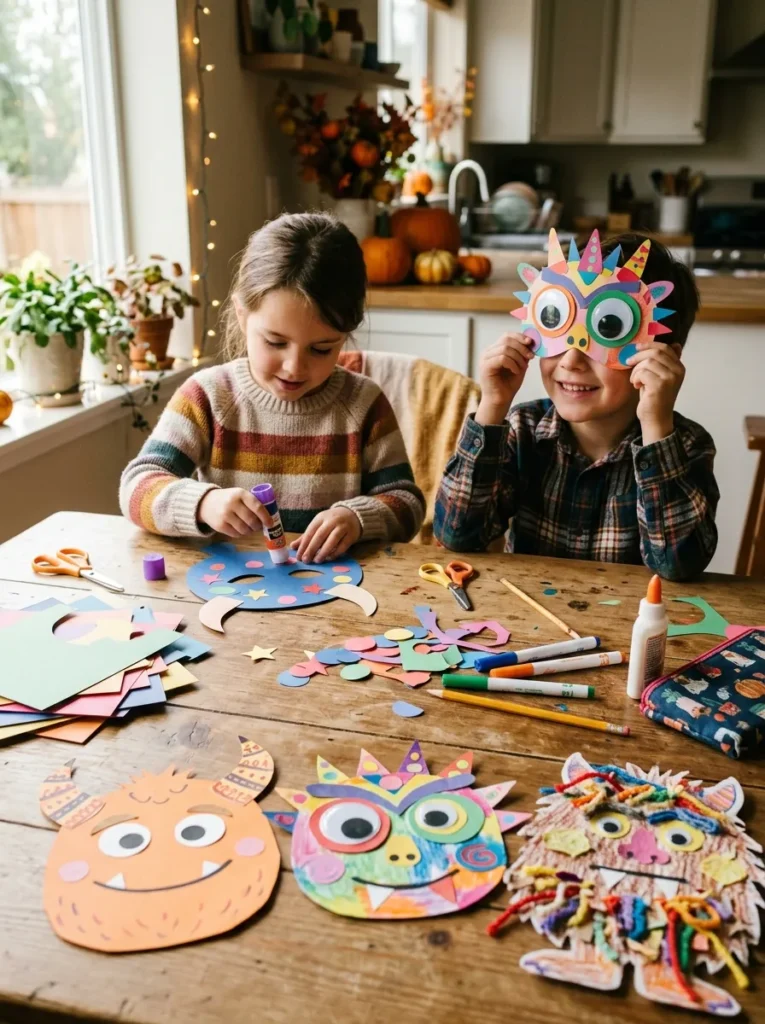
14. DIY Halloween Monster Masks
Give kids a blank mask and let them invent the creature.
What you’ll need
- Cardstock or a paper plate
- Pencil
- Scissors
- Markers or paint
- String or elastic suitable for a mask
- Colored paper
How to make it
Step 1: Draw a simple mask shape.
Step 2: An adult can help cut out the eye openings.
Step 3: Decorate the mask with ears, horns, hair, scales, spots, or other details.
Step 4: Add string or elastic so it can be worn comfortably.
Instead of making every mask scary, challenge children to create the funniest monster possible.
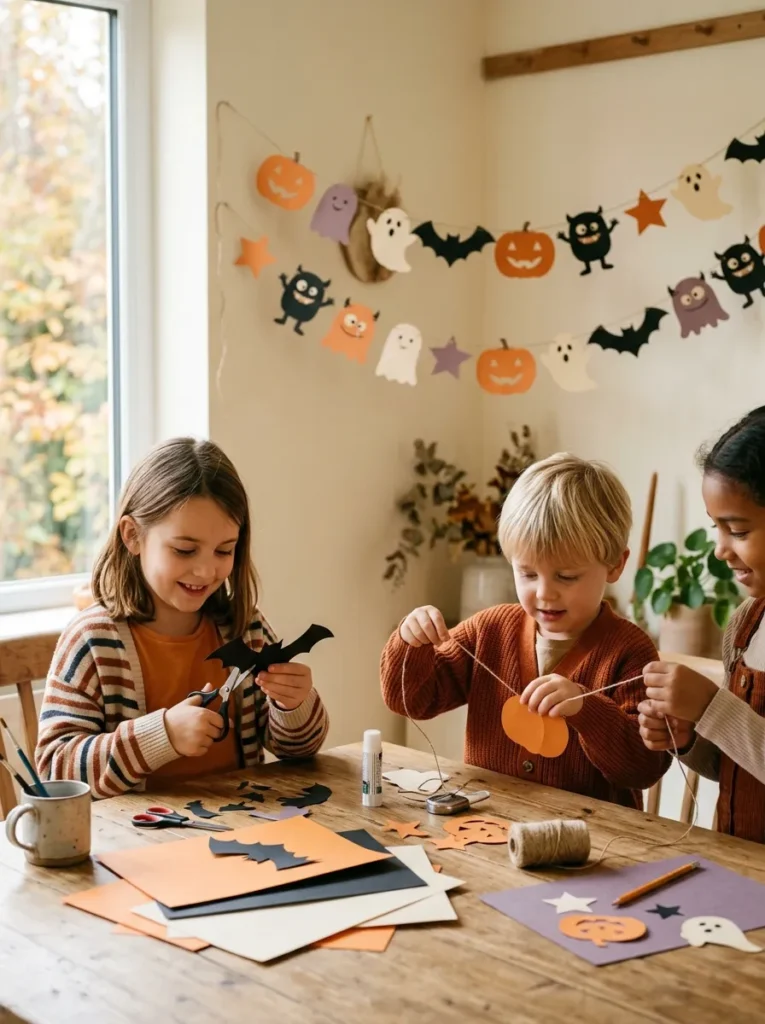
15. Halloween Paper Garland
Make a Halloween garland from a collection of paper characters.
What you’ll need
- Orange, black, white, purple, or cream paper
- Scissors
- Glue
- String
- Markers
Cut out simple pumpkins, bats, ghosts, stars, and monsters.
Decorate them, then attach them to a length of string.
For a more interesting display, alternate large and small characters rather than making every piece the same size.
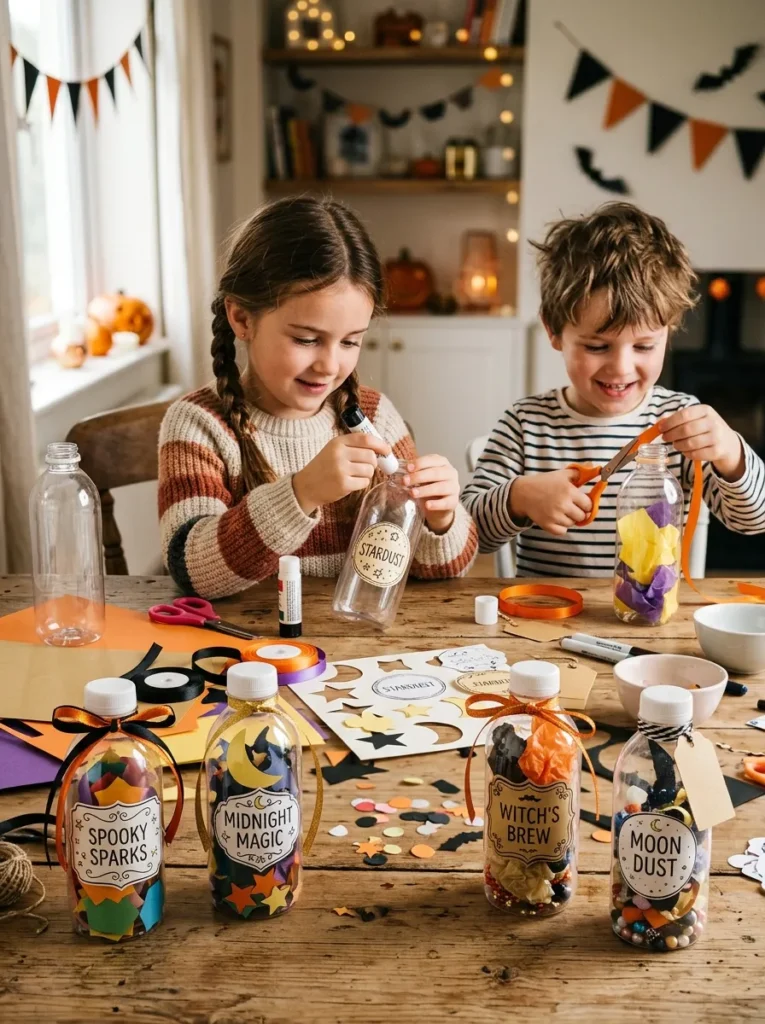
16. Kid-Friendly Halloween Potion Bottles
Create pretend potion bottles that look like they belong in a friendly Halloween laboratory.
What you’ll need
- Clean plastic bottles or containers
- Colored paper
- Markers
- Glue
- Ribbon or string
- Optional: decorative stickers
How to make it
Step 1: Clean and dry the containers.
Step 2: Design labels such as:
- Moonlight Potion
- Friendly Monster Fuel
- Bat Wing Brew
- Pumpkin Sparkle
- Dragon’s Laugh
Step 3: Attach the labels.
Step 4: Add paper tags, ribbons, or other decorations.
Arrange the bottles together as a pretend potion shop.
Safety tip: Keep these as decorative pretend-play containers. Do not use household chemicals, unknown substances, or anything that could be mistaken for food or a drink.
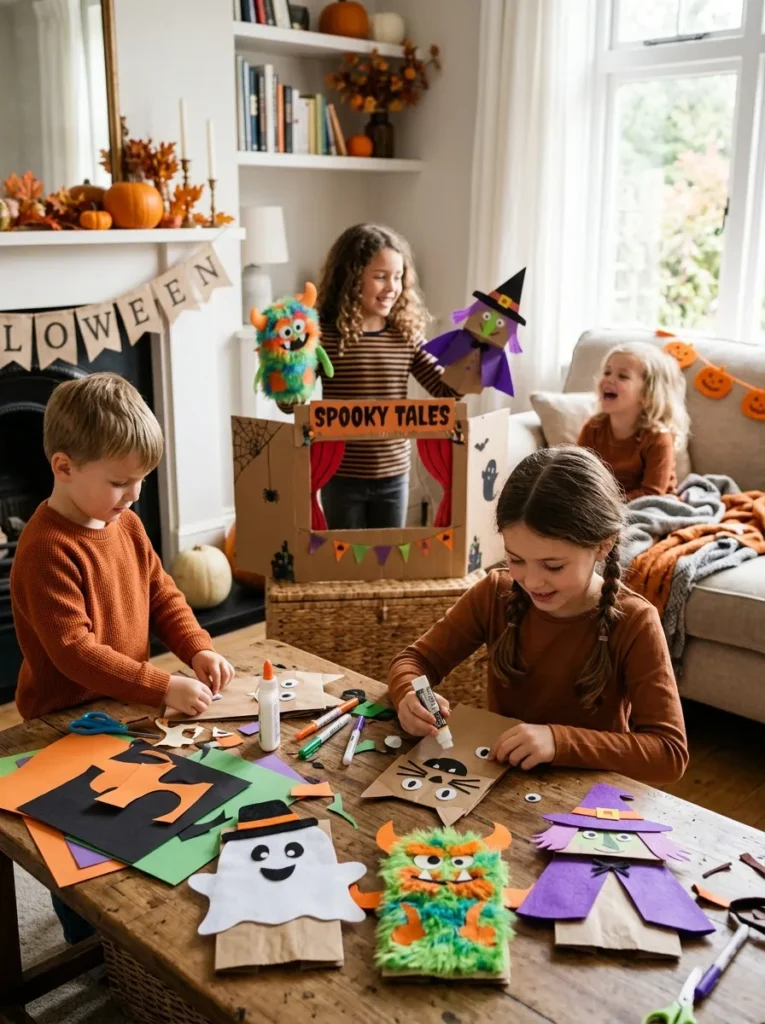
17. Paper Bag Halloween Puppets
A paper bag can become an interactive Halloween character in minutes.
What you’ll need
- Paper bags
- Colored paper
- Glue
- Scissors
- Markers
Create the face on the bottom flap of the bag.
Try a:
- ghost
- monster
- witch
- vampire
- pumpkin
Once the puppets are finished, use them to create a short Halloween story or puppet show.
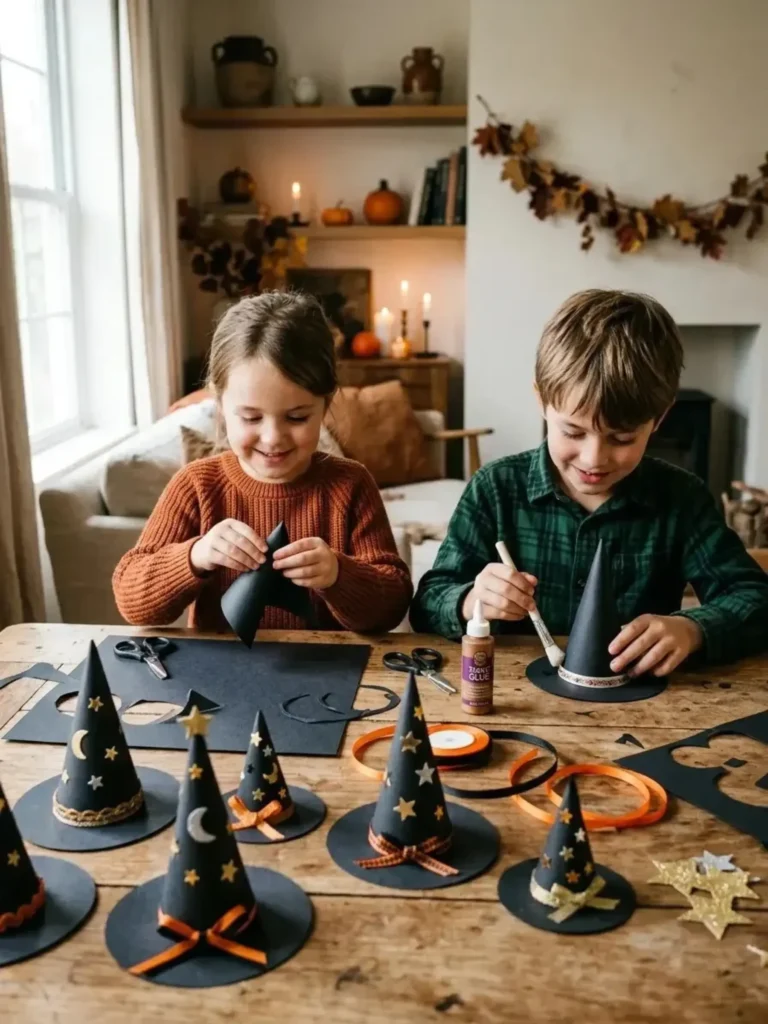
18. Halloween Witch’s Hat Decoration
Make miniature witch hats that can decorate a shelf, activity table, or Halloween display.
What you’ll need
- Black cardstock
- Colored paper
- Glue or tape
- Scissors
- Ribbon
- Markers
Step 1: Roll black cardstock into a cone.
Step 2: Secure the cone.
Step 3: Cut a circular brim and attach the cone to it.
Step 4: Decorate with stars, moons, ribbons, or spiderwebs.
Make several in different sizes for a little Halloween display.
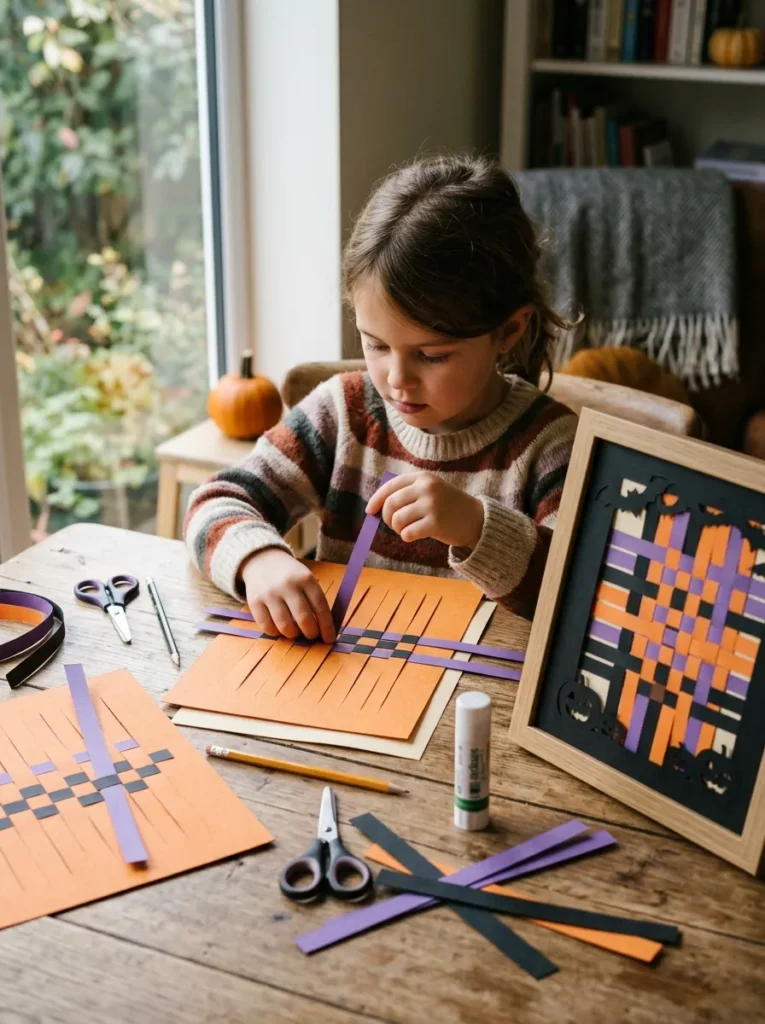
19. Halloween Paper Weaving Art
This project creates a more unusual finished piece than a typical cut-and-glue craft.
What you’ll need
- Two sheets of cardstock
- Scissors
- Glue
- Pencil
- Orange, black, purple, and cream paper
How to make it
Step 1: Cut evenly spaced lines into one sheet without cutting all the way through.
Step 2: Cut strips from the second sheet.
Step 3: Weave the strips through the first sheet, alternating over and under.
Step 4: Secure the ends.
Step 5: Add a Halloween shape or silhouette on top.
Frame the finished piece as Halloween wall art.
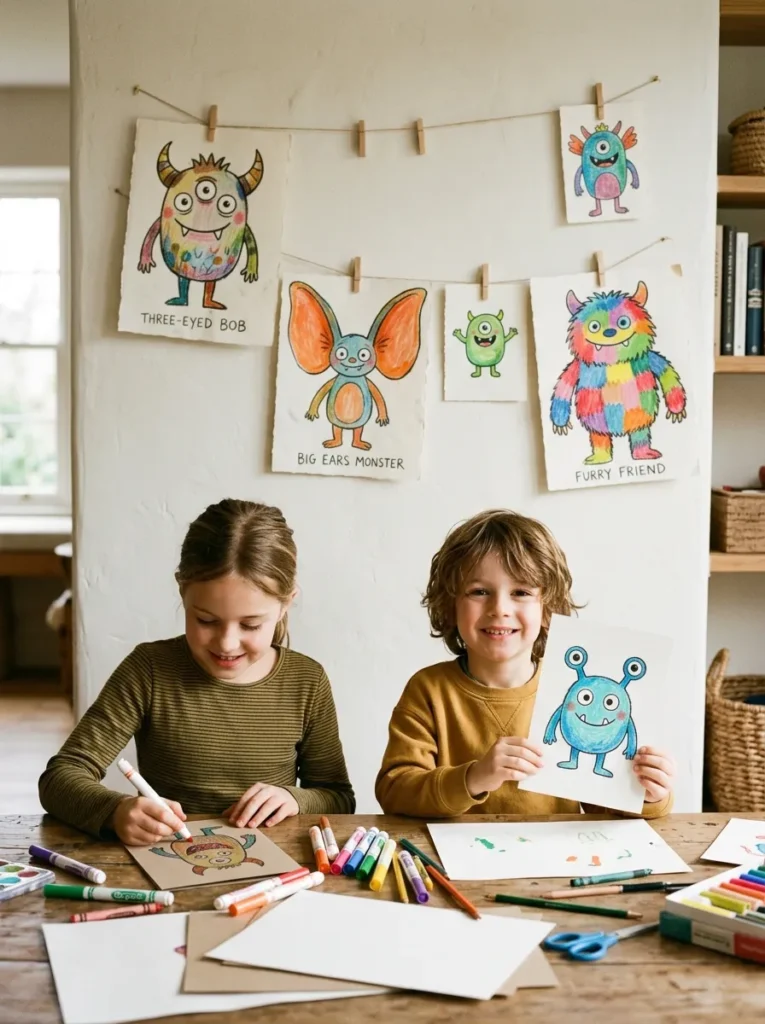
20. Friendly Monster Gallery
Turn individual monster drawings into a family art installation.
What you’ll need
- Cardstock or paper
- Markers, crayons, or paint
- Scissors
- Tape or clips
Each child creates a completely original monster.
Then add:
Name:
Favorite food:
Special power:
One thing it loves:
One thing it is afraid of:
Display all the monsters together as a Friendly Monster Gallery.
The finished gallery can become a Halloween decoration that also gives children something to talk about.
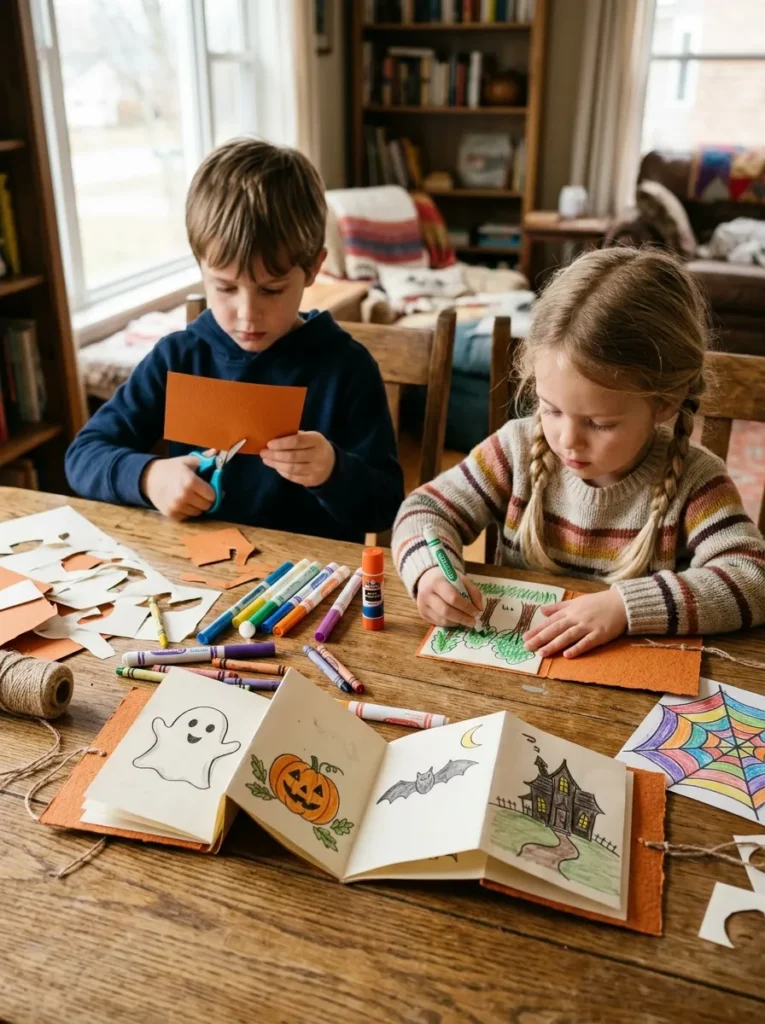
21. Halloween Storybook Craft
Make a tiny handmade Halloween book and let children become both the author and illustrator.
What you’ll need
- Paper
- Cardstock
- Stapler or string
- Markers or crayons
- Scissors
- Glue
How to make it
Step 1: Fold several sheets of paper in half.
Step 2: Add a cardstock cover.
Step 3: Create a Halloween character.
Step 4: Give the character a problem to solve.
Step 5: Draw three to five scenes showing what happens.
Step 6: Create an ending.
You can even turn it into a family project where each person contributes one page.
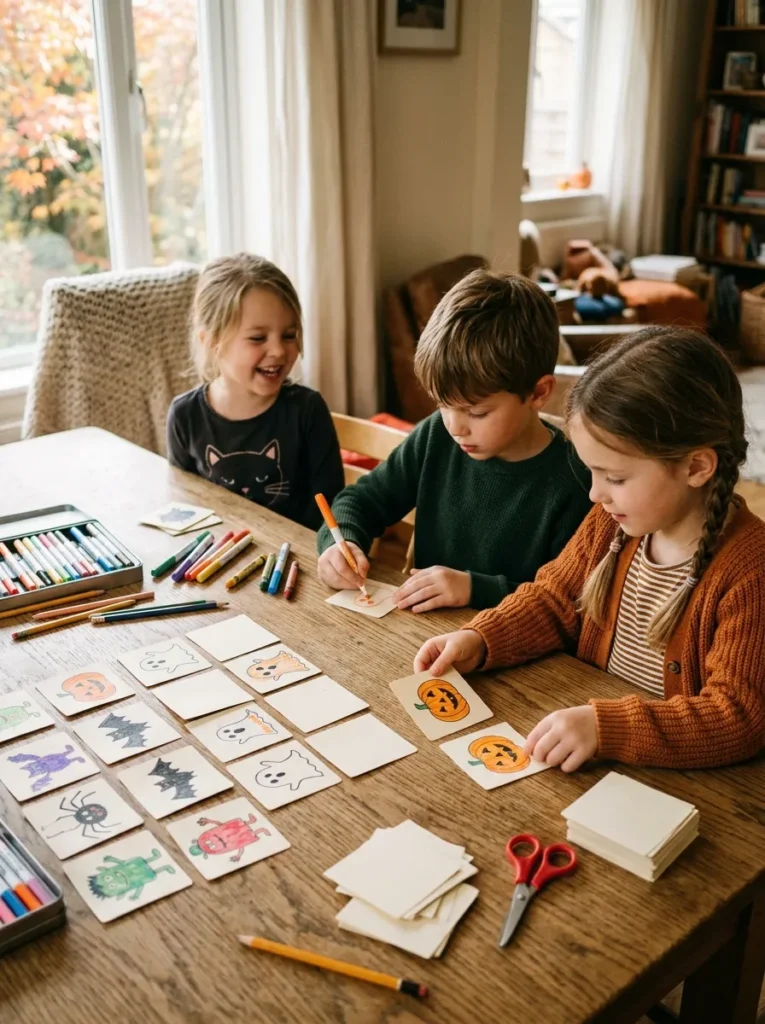
22. DIY Halloween Memory Match Cards
Make a Halloween game that children can play after they’ve finished crafting.
What you’ll need
- Cardstock
- Pencil
- Markers
- Scissors
How to make it
Step 1: Cut the cardstock into equal-sized cards.
Step 2: Make pairs of matching Halloween pictures.
Examples include:
- ghost
- pumpkin
- bat
- spider
- black cat
- monster
Step 3: Create two identical cards for each picture.
Step 4: Mix them up and place them face down.
Players take turns turning over two cards. If they match, that player keeps the pair.
Make it harder
For older children, replace pictures with matching:
character + clue
or
picture + Halloween word.
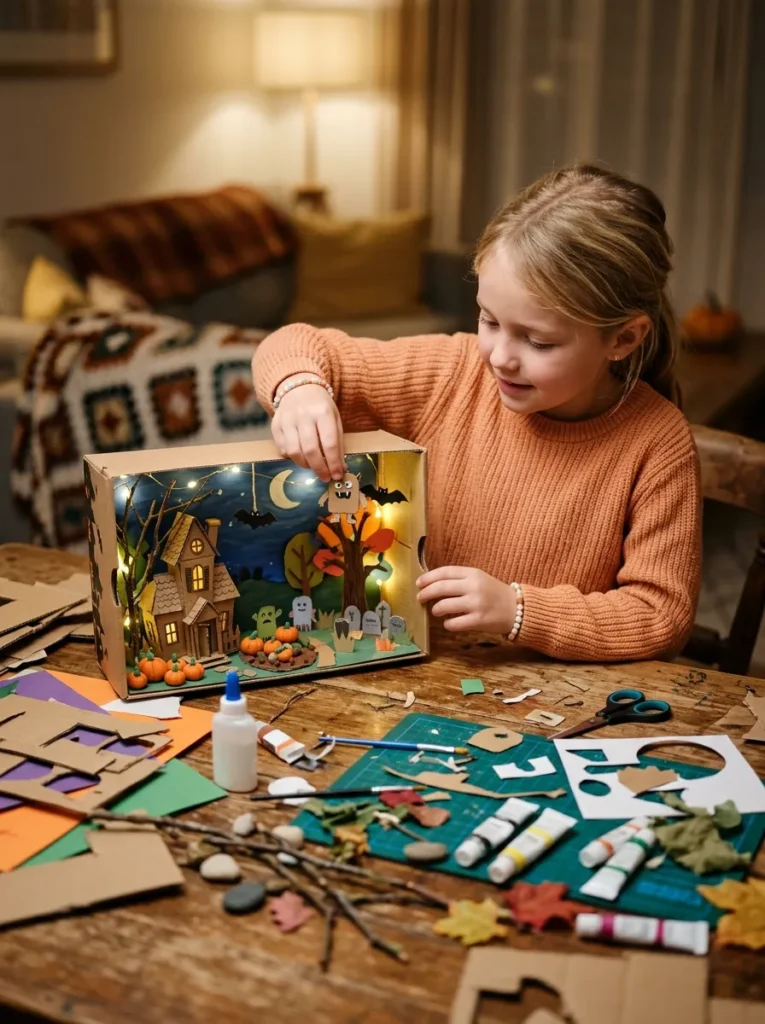
23. Halloween Miniature Scene in a Shoebox
This is another hero craft because the finished result can look much more complicated than the materials suggest.
What you’ll need
- Shoebox
- Cardboard scraps
- Paper
- Glue
- Scissors
- Markers or paint
- Small natural materials such as twigs or clean leaves
- Optional: battery-powered LED light
How to make it
Step 1: Turn the shoebox on its side.
Step 2: Create a background such as a moonlit sky or spooky forest.
Step 3: Build tiny structures from cardboard.
Step 4: Add paper pumpkins, trees, ghosts, bats, or characters.
Step 5: Arrange everything inside the box.
Step 6: Add a small LED light if you want a glowing effect.
Create a tiny story
Don’t just build the scene.
Give it a purpose.
Maybe it’s:
A Monster’s Tiny Village
or
The Haunted Pumpkin Patch
or
The Midnight Halloween Forest
Children can then invent what happens inside their miniature world.
24. Halloween Memory Match + Story Challenge
Take the homemade Halloween cards one step further by turning them into a storytelling game.
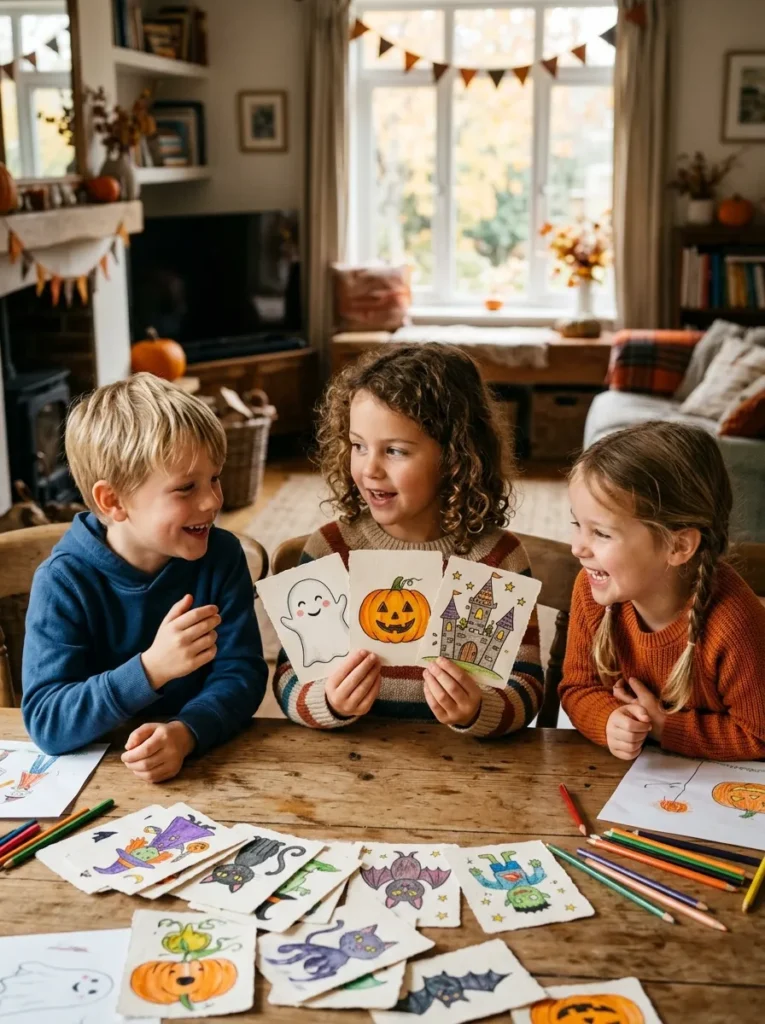
After making the matching cards, place them in a pile.
Each player draws three cards.
For example:
Ghost + Pumpkin + Castle
The player must invent a short story using all three.
This turns a simple handmade game into a creative family activity.
It also means the craft doesn’t end when the glue dries.
25. Build Your Own 3D Halloween Monster
Finish the collection with a craft that encourages children to build rather than simply decorate.
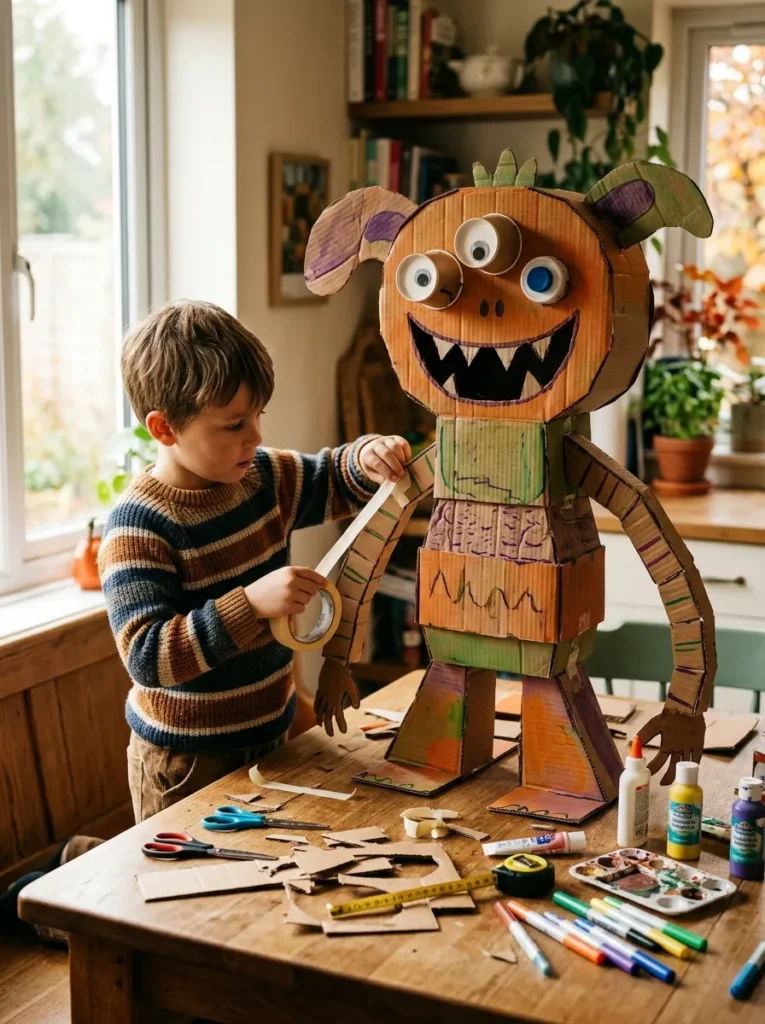
What you’ll need
- Cardboard
- Cardstock
- Paper
- Glue
- Scissors
- Markers or washable paint
- Optional: craft sticks for support
How to make it
Step 1: Sketch your monster before cutting anything.
Think about its shape:
- giant head
- tiny body
- huge feet
- long arms
- three eyes
- funny ears
Step 2: Cut the major cardboard pieces.
Step 3: Create a sturdy base so the monster can stand.
Step 4: Add the body, head, arms, and other features.
Step 5: Cover or paint the cardboard.
Step 6: Add the details that make the monster unique.
Give your monster a personality
Every finished monster gets:
A name
A special power
A favorite food
A weakness
A funny habit
Now the finished monster can become a character in a Halloween story, puppet show, or family game.
How to Make Halloween Crafts More Fun
The best Halloween crafts don’t necessarily require the most supplies. They give children a chance to make decisions, experiment, invent characters, and do something with the finished creation.
Try these simple upgrades:
Turn crafts into challenges
Instead of telling children exactly what to make, give them a challenge:
Make a monster using only three colors.
Or:
Build a haunted house from one cardboard box.
Add a story
A craft becomes more memorable when it has a character and a reason for existing.
A cardboard house becomes a monster’s home.
A shadow puppet becomes part of a mystery.
A paper monster becomes the main character in a story.
Display the finished work
Create a temporary Halloween gallery, miniature village, or craft table where everyone can see what the children made.
Let children change the idea
The goal isn’t perfect Pinterest-style crafts.
If a child turns a bat into a flying purple monster, that’s not a mistake. That’s the point.
Easy Halloween Craft Materials to Keep on Hand
You don’t need to buy a different craft kit for every project.
A small collection of basic supplies can cover most of these activities:
- Cardboard boxes
- Cardboard tubes
- Paper plates
- Paper cups
- Paper bags
- Cardstock
- Construction paper
- Glue
- Child-safe scissors
- Markers
- Washable paint
- Yarn
- Craft sticks
- String
- Tape
- Clean recycled containers
- Autumn leaves
- Small LED lights
Keeping a simple craft box ready can make spontaneous screen-free activities much easier.
How to Choose the Right Halloween Craft
If you need something quick, start with a paper plate monster, cardboard tube character, leaf character, or Halloween puppet.
For a longer afternoon project, try the haunted house, shadow puppet theater, miniature shoebox scene, or 3D monster.
If you’re planning a Halloween party, the monster masks, memory cards, paper puppets, or Halloween garland can work especially well because children can make something and then use it during the gathering.
For even more ideas beyond crafts, explore our Halloween activities for kids for games, challenges, scavenger hunts, and other ways to make October more fun.
And if you’re looking for a craft that can become a new family tradition, try creating a Halloween miniature scene or family monster gallery every October and add something new each year.
Frequently Asked Questions
What are some easy Halloween crafts for kids?
Some easy Halloween crafts for kids include paper plate monsters, cardboard tube bats, leaf characters, Halloween puppets, paper ghosts, and homemade memory cards. These projects use simple materials and can be adapted for different ages and skill levels.
What can kids make for Halloween with cardboard?
Kids can turn cardboard boxes and scraps into haunted houses, shadow puppet theaters, miniature Halloween scenes, 3D monsters, and other imaginative projects. Cardboard is especially useful because it can become both a craft material and part of the finished play activity.
What Halloween crafts can kids make at home?
Many Halloween crafts can be made at home with everyday supplies such as paper, cardboard, glue, markers, scissors, paper plates, and recycled containers. Projects such as shadow theaters, monster masks, puppets, and miniature scenes can provide a full afternoon of creative play.
How can I make Halloween crafts more interesting for kids?
Give the craft a second purpose. A homemade puppet can become part of a show, a cardboard house can become a miniature world, and a monster drawing can become a character with a name and story.
What are good Halloween crafts for a Halloween party?
Monster masks, paper puppets, memory match cards, friendly monster galleries, and simple decorations work well for parties because children can make something during the event and then use or display it afterward.
What Halloween crafts can kids make without using a lot of supplies?
Paper plate monsters, leaf characters, cardboard tube bats, paper puppets, and simple Halloween storybooks can be made with a few inexpensive materials. Reusing cardboard and clean household packaging can also keep the cost low.
Final Thoughts
Halloween crafts don’t have to be complicated to be memorable.
Sometimes the best project starts with something ordinary — a cardboard box, an empty tube, a paper plate, a few leaves, or a sheet of paper — and ends with something children can actually play with.
That’s why the most valuable crafts in this collection aren’t simply decorations.
The shadow theater becomes a show.
The miniature shoebox becomes a world.
The monster becomes a character.
The memory cards become a game.
And a simple piece of cardboard can become the beginning of an afternoon of imagination.
If you’re looking for even more ways to keep kids busy without screens, explore our [20 Screen-Free Activities for Kids to Do at Home] for more creative ideas the whole family can enjoy.
Save this list for October and let the kids choose what they want to make next.